 How to Create a Google Classroom Custom Banner
Google Classroom is a great application for Google using educators and students to manage assignments, communicate and collaborate, and go paperless!
Google has made great strides in updating this application based on the feedback submitted by educators like you.
Google Classroom is only going to get better!
So if you haven’t taken the time to learn this great application, now is the time.
In this post and video tutorial, I will show you how to create a custom header with Google Drawings, give you a FREE template, and show you how to upload it into Google Classroom!
How to Create a Google Classroom Custom Header with Google Drawings
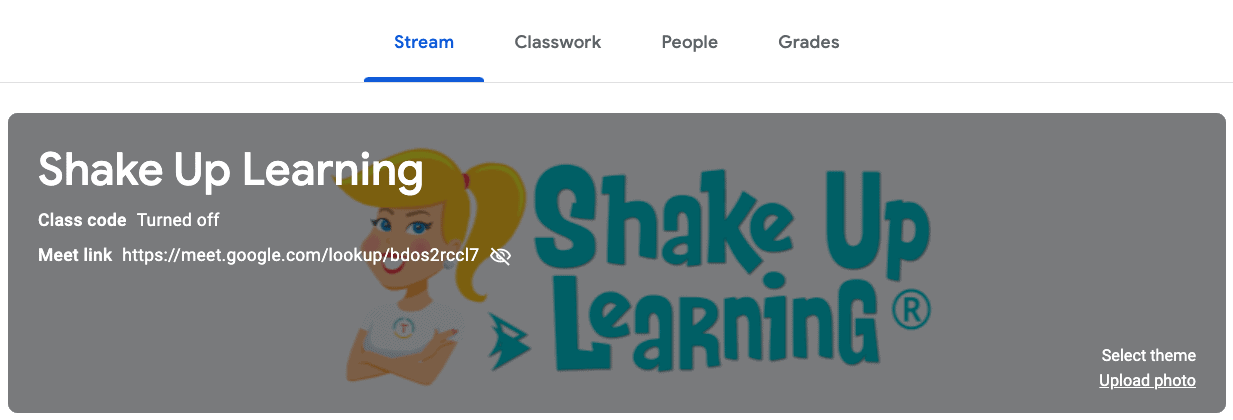
One feature of Google Classroom is the ability to customize the theme and header (see example below).
You can choose from ready-made themes and header images from Google’s gallery, or you can upload your own image to customize the look and feel of all of your classes.
Adding your own image usually requires more than just finding a picture stored on your drive.
Google Classroom is responsive, which means the size and shape of the header change with the size of your screen on your desktop, laptop, tablet, or phone.
For this reason, you will notice most of Google’s headers have a pattern that works well for this type of responsive application.
Faces and clipart can get distorted in the header, but I have found a way that works for me using Google Drawings to create the header image.
Google Drawings is the unsung hero of the Google Drive suite of applications.
It is a very powerful tool for creation.
See this infographic for more details: 10 Ways to Use Google Drawings in the Classroom.
Google Drawings allows you to create an image in any size that you want, so it was an easy option for creating a custom Google Classroom header.
Below are step-by-step directions to help you create a custom header for your Google Classroom classes.
Things to Know About the Header Image
The header ONLY appears at the top of the stream in Google Classroom.
Since text appears on top of the image, there is a grey filter that will go over your image. Keep this in mind as you design your image.
In my example below, I used a white background and the filter turns it grey.
The other thing to remember is that Google Classroom is a responsive website that will resize based on the size of the screen. So, what looks good on the desktop, may look very different on mobile.
Create a Header Image with Google Drawings
There are many tools that you can use to create a custom banner for Google Classroom.
My three favorites are Google Drawings, Google Slides, or Canva.com. For the purposes of this post, we are keeping things simple with Google Drawings. But you should definitely check out the super cool templates in Canva for Education.
FREE Blank Template
I recommend you learn how to create an image from scratch, but to save time, I’ve also created blank template. CLICK HERE to make a copy of the header image template.
1. Go to drawings.google.com to open a new drawing.
2. Click on the title (top left) and rename it.
3. Go to File>Page Setup
- From the drop-down, select Custom
- Change inches to pixels
- Input 1000 x 400 pixels and click Okay.
4. Here comes the fun part! Create your image!
- Suggestion: right-click on the image and choose a background color to get started. (I chose a white background.)
5. Now you can insert any images or text that you want, like your school logo, a Bitmoji, or other images that help define your class.
6. When you are done creating your image, go to File>Download as> choose .png or .jpeg to download the image to your computer. (Note: Jpeg is good if for real photographs, .png is good for clip art.)
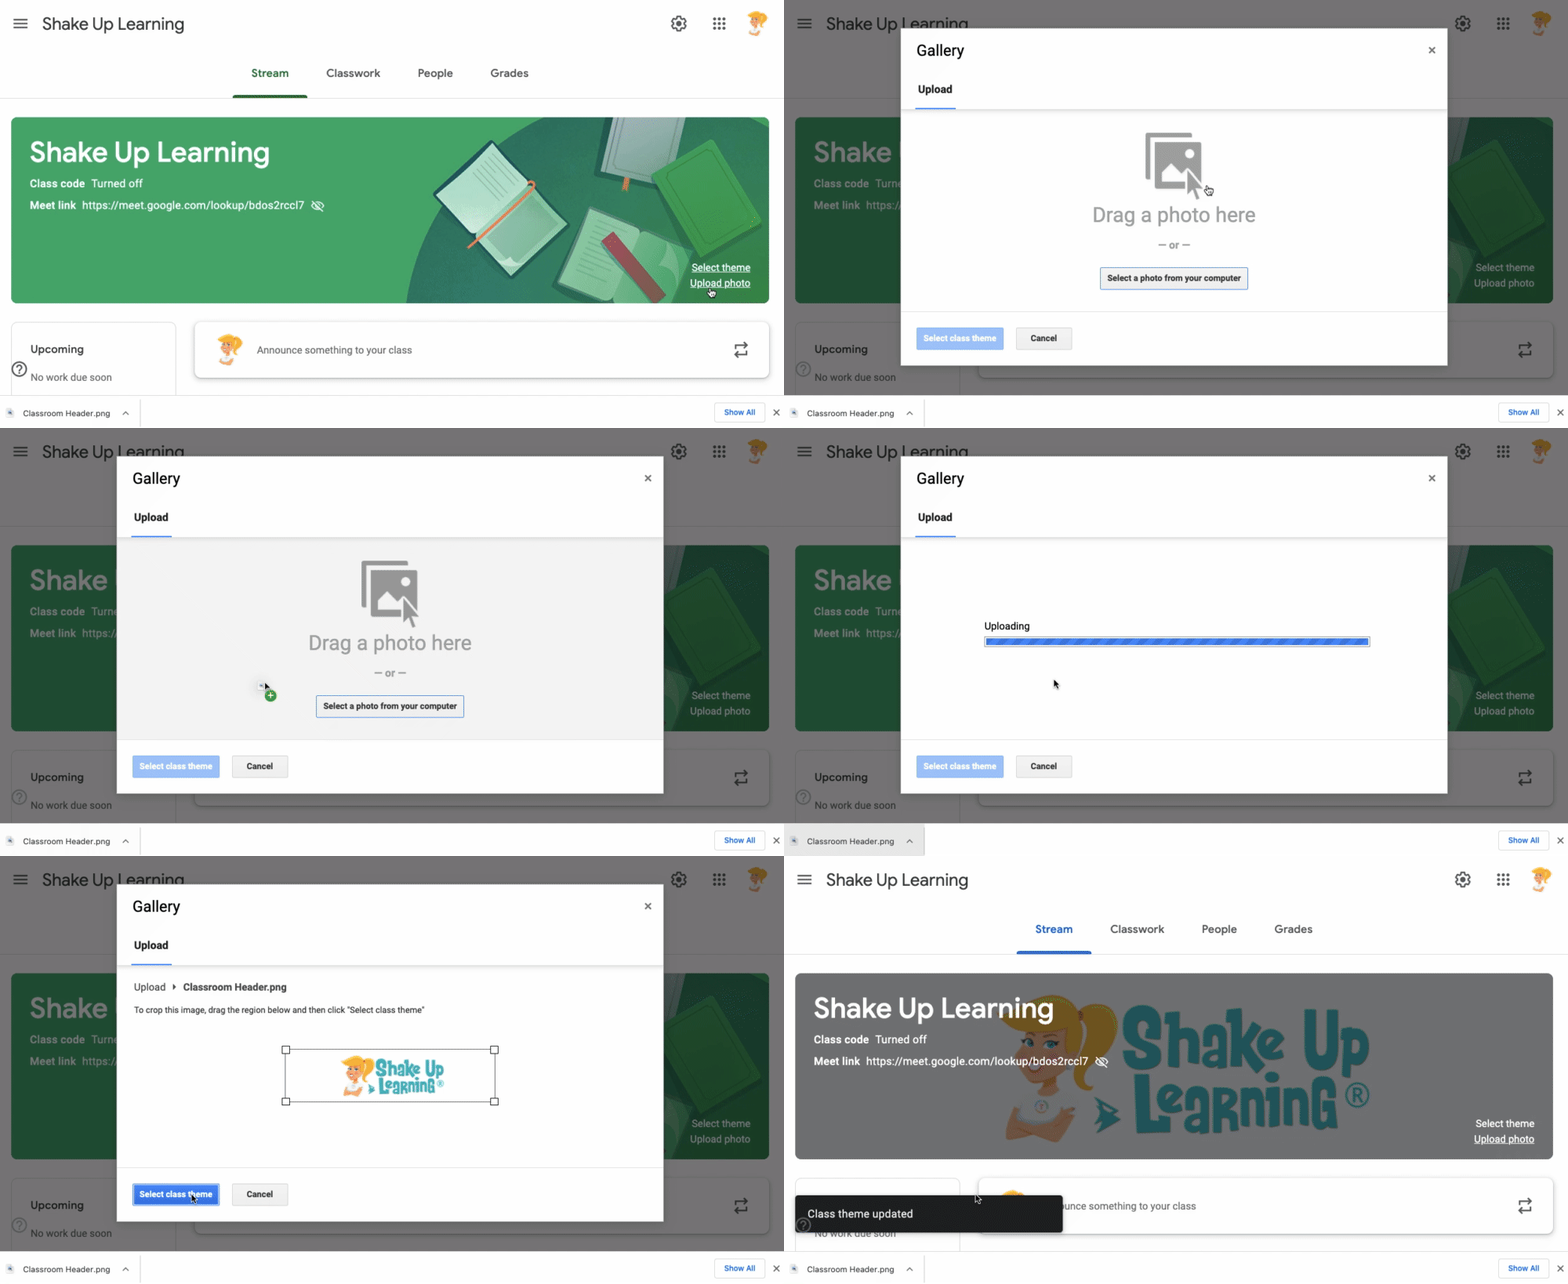
7. Now, upload your new header into Google Classroom.
- Go to Google Classroom and choose the class where you wish to update the header.
- On the Stream, near the bottom-right of the current image header, select “Upload photo.” Navigate to where you downloaded your new header, or drag and drop to upload.
- Move and crop the image if you like to get it exactly where you want it. Then click, “Select class theme” at the bottom of the window.
- Voila! You have a new customized header! (Note: the theme colors are not customizable, but Google Classroom tries to somewhat mimic the colors in your image. I’m hoping for the ability to choose custom colors in the future!)
- Tip: Choosing a different header, even just with minor changes will help you students see at a glance which class they are in and help keep them on track.
Join the Google Classroom Master Class Online Course

Perfect for beginner to intermediate skill levels! Consider this your video guide to Google Classroom!
Click here to learn more and to ENROLL TODAY!
Check out all of my Google Classroom Resources here!
© Shake Up Learning 2023. Unauthorized use and/or duplication of this material without express and written permission from this blog’s author and/or owner is strictly prohibited. Excerpts and links may be used, provided that full and clear credit is given to Kasey Bell and Shake Up Learning with appropriate and specific direction to the original content on ShakeUpLearning.com. See: Copyright Policy.
 How to Create a Google Classroom Custom Banner


Hi Kasey,
The one reason that I’ve been flipping back and forth between new and old forms is the way that they have changed making a custom banner for forms. Do you think that image ratio you mentioned for the Google Classroom banner is the same for new Google forms?
Oh! Good question, Amber! I tried it and it will work, but seems to be slightly thinner. I would try 1500×300. Seems to cut off the top of the bigger one.